Login to the Document Repository at the following address using your UMW NetID and password:
http://umw.edu/documents/wp-admin
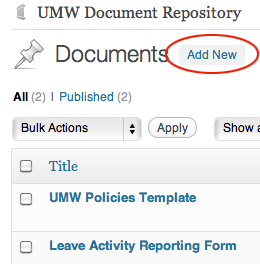
Once there, click on the item on the left labelled “Documents,” just beneath “Comments.”

Click “Add New” next to the title of the page at the top:
You will now be viewing a screen that looks a lot like a regular page or post editing screen. But you won’t be typing anything into the editor. Instead, you will be linking this to your document.
To do so, first title your document. The document title is what folks will READ, so make it a real title, not a filename. Most likely, there is a title displayed at the top of your form, like “Application for Readmission.” In this case, that’s what we will type into the title field:

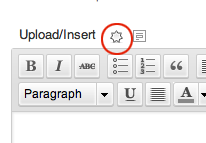
Then, you upload your file. to do so, click on the little round, sun-shaped icon above the editing bar, where it says “Upload/Insert”:
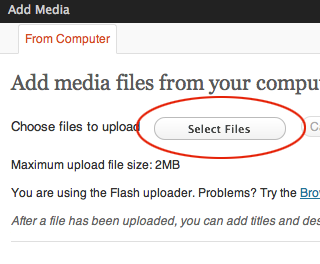
You will then get a popup panel that will allow you to browse to the document from your computer. To do so, click “Select File”:
Browse to your computer, find the file, and select “Open”:

Your document is now there! But, you’re not done. You need to categorize your document so it can be searched for and displayed by others. YOU MUST TAG YOUR FORM OR IT WILL NOT BE AVAILABLE FOR OTHERS TO USE!
To learn how to categorize your document, continue on to the tutorial “Categorizing Documents in the Repository.”